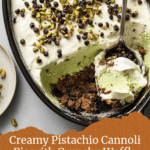
No Bake Pistachio Cannoli Pie Recipe
Introduction
This No Bake Pistachio Cannoli Pie is a delightful twist on the classic Italian dessert, combining creamy ricotta and pistachio flavors in a crunchy waffle cone crust. It’s refreshingly easy to make and perfect for when you want an impressive treat without baking.
Ingredients
- 7 oz waffle cones (~12 cones)
- ¼ teaspoon salt
- ½ cup unsalted butter, melted
- 1 ½ cups cold heavy whipping cream
- ½ cup mascarpone cheese (optional, but stabilizes the whipped cream)
- ¼ cup powdered sugar
- ½ teaspoon vanilla extract
- 3 cups ricotta cheese (~32oz)
- ¾ cup unsweetened pistachio butter
- 1 ½ cups powdered sugar
- 2 tsp vanilla extract
- 2 tsp orange zest
- 1 cup mini chocolate chips
- Pinch of salt
- For topping: 2 tablespoons chopped pistachios (unsalted) and 2 tablespoons mini chocolate chips
Instructions
- Step 1: Strain the ricotta. Several hours before assembling, place the ricotta in cheesecloth or a paper towel-lined strainer over a bowl and refrigerate to drain excess liquid. This helps avoid a runny filling, but it’s optional.
- Step 2: Make the crust. Pulse the waffle cones and salt in a food processor until fine crumbs form. Add melted butter and pulse until combined.
- Step 3: Press the crust mixture firmly into the bottom of a 12.5-inch gratin dish, pie pan, or 9×13-inch baking dish. Refrigerate while preparing the filling.
- Step 4: Whip the cream. Using an electric mixer, whip the heavy cream, mascarpone, powdered sugar, and vanilla extract until stiff peaks form, about 2-4 minutes. Set aside.
- Step 5: Prepare the pistachio filling. In a bowl, mix ricotta, pistachio butter, powdered sugar, vanilla extract, orange zest, and a pinch of salt until smooth. Stir in mini chocolate chips.
- Step 6: Fold in about 1 cup of the whipped cream gently with a spatula until evenly combined.
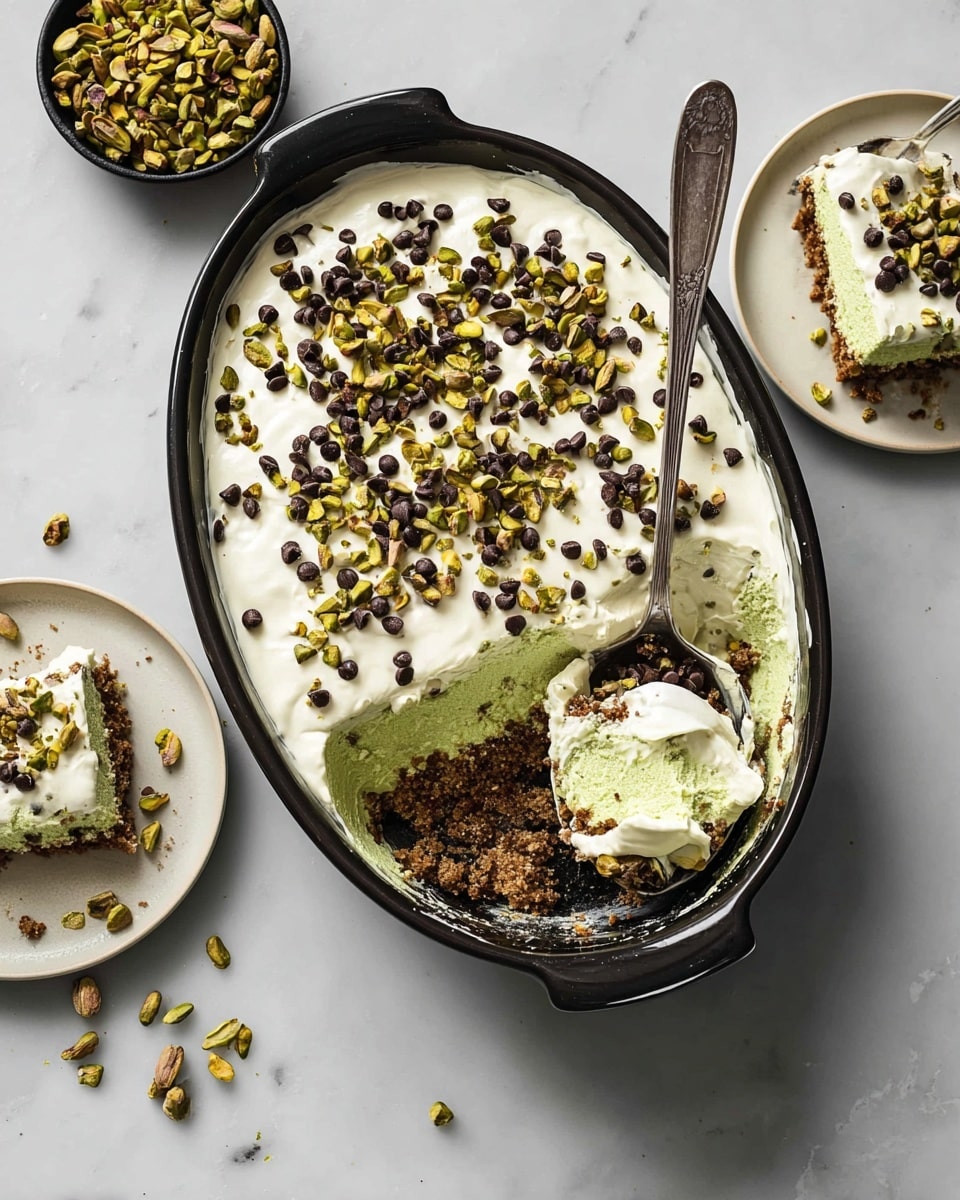
- Step 7: Assemble the pie. Spoon the pistachio filling over the crust and smooth the surface. Spread the remaining whipped cream on top.
- Step 8: Sprinkle with chopped pistachios and mini chocolate chips for garnish.
- Step 9: Cover and refrigerate for at least 2 hours or overnight to set. Scoop to serve and enjoy!
Tips & Variations
- For a richer crust, toast the waffle cone crumbs lightly before mixing with butter.
- If you don’t have pistachio butter, finely ground pistachios can be mixed with a bit of cream to substitute.
- Add a splash of orange liqueur instead of orange zest for an adult twist.
Storage
Store the pie covered in the refrigerator for up to 3 days. The crust will soften over time but remains delicious. Reheat is not recommended; serve chilled for best texture and flavor.
How to Serve
Serve this delicious recipe with your favorite sides.
FAQs
Can I use regular cream cheese instead of mascarpone?
Yes, mascarpone stabilizes the whipped cream and adds richness, but cream cheese is a workable substitute if whipped well and softened.
What if I don’t drain the ricotta?
The filling may be a bit runnier, but it will still taste good. Draining helps achieve a thicker, firmer filling for easier slicing and serving.
PrintNo Bake Pistachio Cannoli Pie Recipe

This No Bake Pistachio Cannoli Pie is a creamy, nutty dessert combining a crunchy waffle cone crust with a luscious pistachio ricotta filling and light whipped cream topping. Perfectly flavored with vanilla and orange zest, and studded with mini chocolate chips, it’s an effortless yet elegant treat that requires no baking and can be prepared ahead of time for a refreshing and indulgent finish to any meal.
- Prep Time: 20 minutes plus 4 hours to overnight for ricotta draining
- Cook Time: 0 minutes
- Total Time: 20 minutes active + 4 hours to overnight chilling
- Yield: 8–10 servings 1x
- Category: Dessert
- Method: No-Cook
- Cuisine: Italian-American
Ingredients
Crust
- 7 oz waffle cones (~12 cones)
- ¼ teaspoon salt
- ½ cup unsalted butter, melted
Whipped Cream
- 1 ½ cups cold heavy whipping cream
- ½ cup mascarpone cheese (optional, stabilizes whipped cream)
- ¼ cup powdered sugar
- ½ teaspoon vanilla extract
Pistachio Filling
- 3 cups ricotta cheese (~32 oz)
- ¾ cup unsweetened pistachio butter
- 1 ½ cups powdered sugar
- 2 tsp vanilla extract
- 2 tsp orange zest
- 1 cup mini chocolate chips
- Pinch of salt
Topping
- 2 tablespoons chopped pistachios (unsalted)
- 2 tablespoons mini chocolate chips
Instructions
- Strain the ricotta: Several hours or preferably a day before assembling the pie, place the ricotta cheese in cheesecloth or a paper towel-lined strainer over a bowl to drain excess liquid. Refrigerate during this time. This step helps achieve a thicker filling but can be skipped if short on time.
- Make the crust: In a food processor, pulse the waffle cones and ¼ teaspoon salt until they become fine crumbs. Add the melted butter and pulse again until the mixture is evenly combined.
- Press the crust: Transfer the crust mixture into a 12.5-inch gratin dish, pie pan, or 9×13 inch baking dish. Use the bottom of a measuring cup to firmly press the crumbs into an even layer at the bottom. Place the crust in the refrigerator to chill while preparing the filling.
- Make whipped cream: Using an electric hand mixer, whip the cold heavy cream, mascarpone cheese, powdered sugar, and vanilla extract until stiff peaks form, about 2 to 4 minutes. Set aside the whipped cream for folding into the filling and topping the pie.
- Prepare pistachio filling: In a large mixing bowl, combine the drained ricotta, pistachio butter, powdered sugar, vanilla extract, orange zest, and a pinch of salt. Mix with an electric mixer until smooth and creamy. Fold in the mini chocolate chips until evenly incorporated.
- Fold in whipped cream: Gently fold about 1 cup of the whipped cream into the pistachio mixture using a spatula until smooth and evenly combined to lighten the texture.
- Assemble the pie: Spoon the pistachio filling over the chilled crust and smooth into an even layer. Spread the remaining whipped cream over the top.
- Add toppings and chill: Sprinkle chopped pistachios and mini chocolate chips evenly over the whipped cream layer. Cover the pie and refrigerate for at least 2 hours or overnight to allow flavors to meld and the pie to set.
- Serve: Scoop the chilled Pistachio Cannoli Pie and enjoy this creamy, crunchy no bake dessert.
Notes
- Straining the ricotta in advance improves filling texture but can be skipped for a slightly looser filling.
- Mascarpone cheese in the whipped cream stabilizes it but can be omitted if unavailable.
- Use unsalted butter and pistachios to better control the salt level in the dessert.
- The crust made from waffle cones adds a unique texture and flavor compared to traditional pie crusts.
- Orange zest adds a fresh citrus note that balances the richness of the pistachio and cream.
- Refrigerate the assembled pie adequately to set the filling for clean slices when serving.
- The pie is best served chilled and enjoyed within 2-3 days.
Keywords: No Bake Pistachio Cannoli Pie, Pistachio Pie, No Bake Pie, Cannoli Pie, Ricotta Dessert, Pistachio Dessert, Easy No Bake Dessert